Build a new paver patio
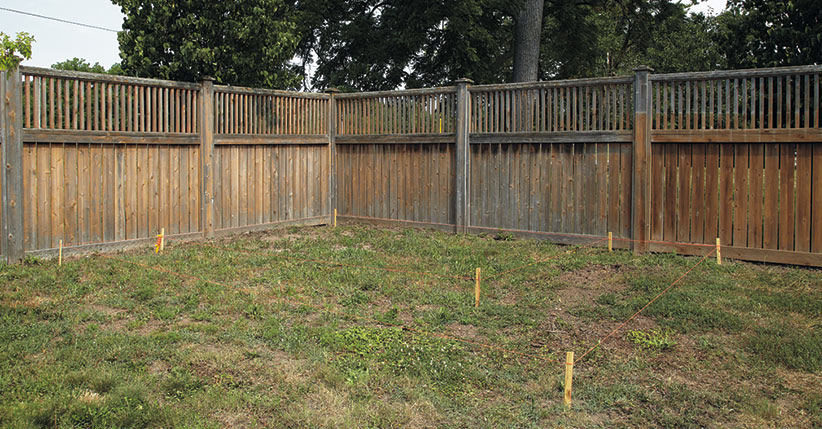
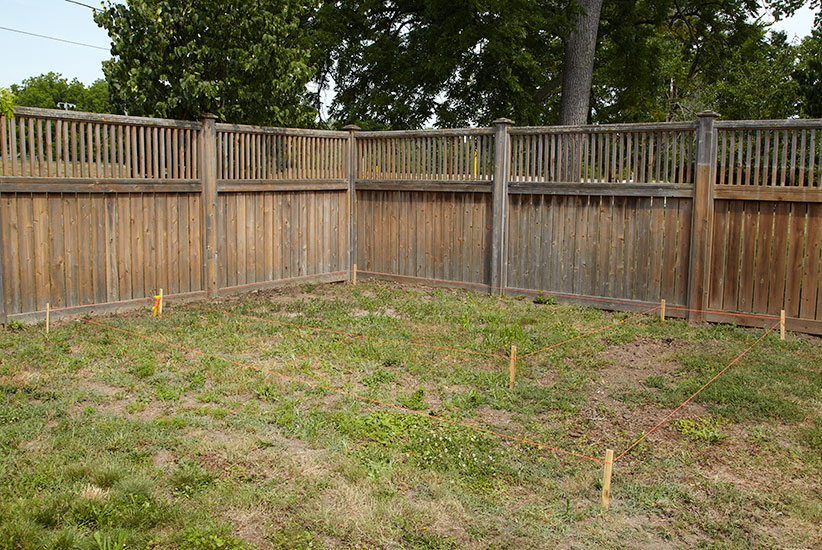
Do you have an unused corner of your yard just begging for a makeover? There’s certainly not much to look at in the before photo above. But with some easy-to-find materials and a few days of work, you can transform a blah space like this into an inviting getaway.
You Might Also Like:
DIY Potting Bench
Woodworking Projects for the Garden
Patio Design Ideas
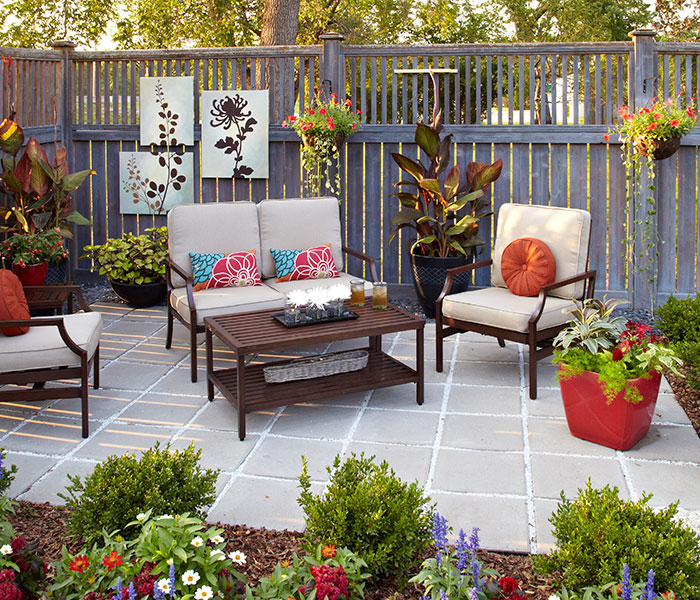
Sometimes it’s nice to have a patio escape away from the house! At 14½ ft. long and 9½ ft. wide, this one has plenty of room for furniture and a few friends to move around without tripping over each other. On the other hand, you won’t feel lonely even if you’re the only one enjoying a morning cup of coffee and listening to the birds.
Save money with a DIY paver patio
Don’t dismiss those concrete pavers you see at most home improvement stores. Sure, they’re inexpensive, but they don’t have to look like you couldn’t spare the change for stone. It’s all in how you put them together. By using a simple pattern, we created a sophisticated look and saved some serious cash to boot. Would you believe the patio installation was only around $650? Doing the work yourself will save a bundle. Here’s how we installed the patio in the photo above.
Tools for installing a paver patio
- Measuring tape
- Twine
- Stakes
- Wheelbarrow
- Spade
- Level
- Tamper
- Screed
- Rubber mallet
- Spacers
- Hammer
- Mulch rake
- Broom
Materials
- 16‐in. square concrete pavers
- 12‐ and 16‐in. round pavers
- Crushed granite
- Gravel
- Sand
- 2×4 for screed
- Plastic edging kit
Step 1: Prepare the base
Measure the space for the patio and mark it out with stakes and twine. This one is 14½ ft. long and 9½ ft. wide. Check to be sure it’s square by measuring diagonally across the patio. The two measurements should match. If not, adjust the stakes until they do.
Start digging
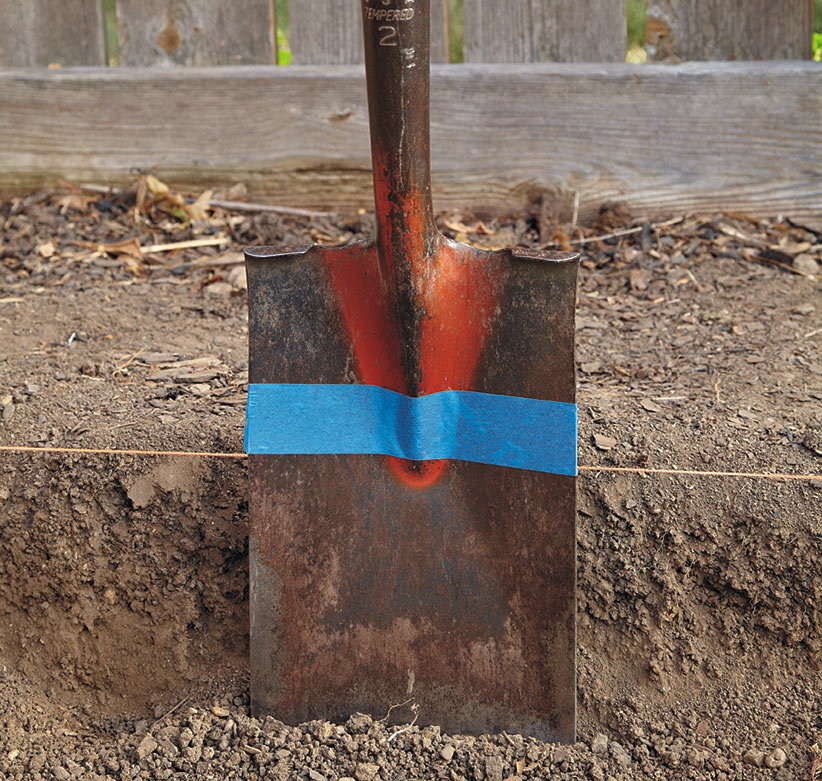
Excavate 6 in. of soil to accommodate 3 in. of gravel, 1 in. of sand and the 2-in. thick square pavers. The photo above shows you an easy tip for checking the depth — place a piece of tape on the shovel so you know how deep to dig.

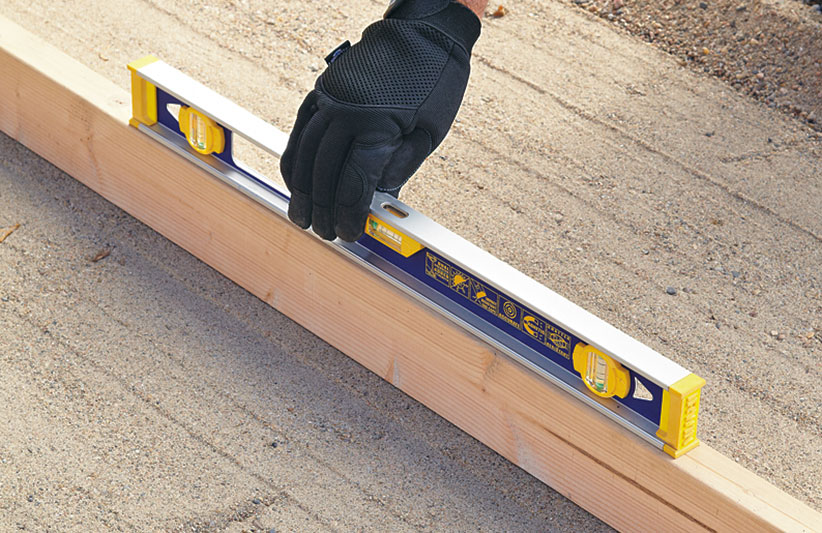
Level the area
When you’re done digging, rake the soil until its even, and finish it off with a screed — a 2×4 cut the width of the patio used for leveling. With the board level, pull it firmly from one end to another. Check out the photo above to see this tool in action.
Step 2: Add the aggregate
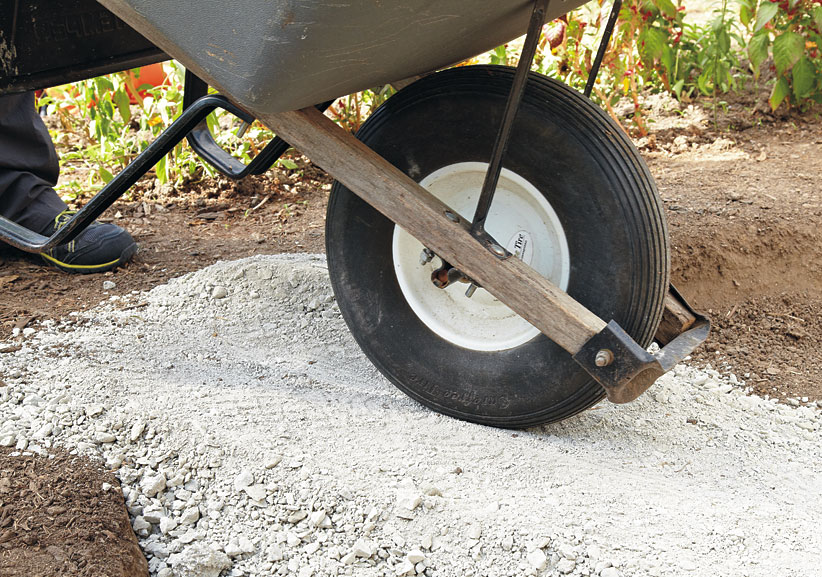
Gravel gives your patio a strong foundation so it won’t sink later. We used limerock gravel because it’s economical in our area and the ½- to 1-in. stone compacts well. Dump the first load in the corner and rake it into a ramp for the wheelbarrow like we did in the photo above. It’s easier to get in and out that way.
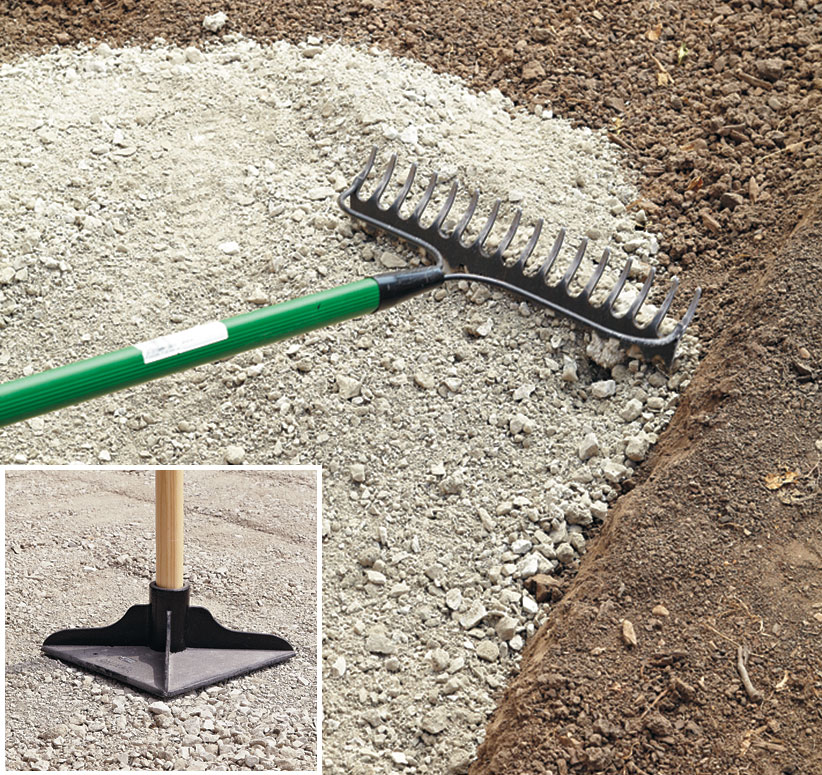
Shovel all the gravel in then rake it smooth with the mulch rake in the photo above. Double-check the depth with a ruler. If it’s off the 3-in. depth by more than ½ in. either way, dig out or add more material. Use the screed to level the gravel, then the tamper in the inset to compact the gravel.
You Might Also Like:
Small Space Patio Border
Clever Garden Tool Storage Tips
How to Clean and Sharpen Rusty Pruners
Add sand
Add 1 in. of sand, screed it and check for level.
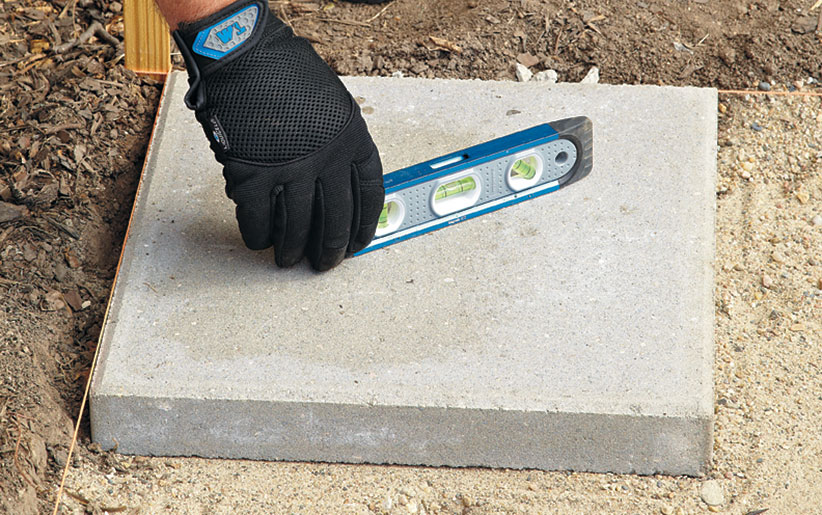
Step 3: Install the pavers
Place the first 16-in. square concrete paver in a corner, as we did in the photo above, and work out from there, checking each one to be sure it’s level as you go. Make any adjustments by adding or brushing away sand.
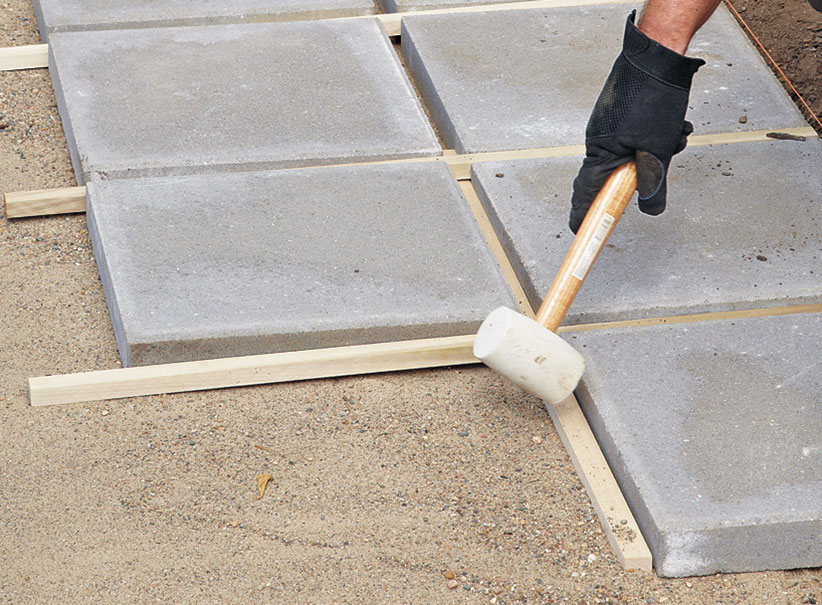
Space the pavers
Follow the twine instead of the dug edge as you put them in so you’ll have a straight line of pavers. We liked the way a 1-in. space between pavers looked. And spacers were an easy way to keep that gap true.
Lay one spacer snug to a paver and place another paver right next to it. You can see in the photo above that it’s possible to lay down several pavers at once this way and be sure they’re spaced correctly.
Adjust the position of the pavers with a white rubber mallet, if needed. It won’t leave marks like a black mallet will.
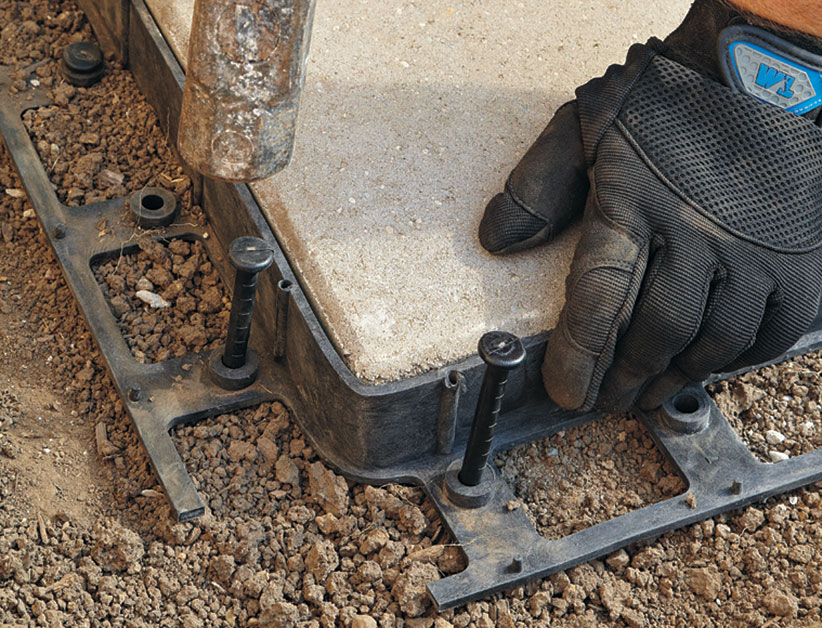
Step 3: Give it an edge
To keep the patio firmly in place, we went with plastic paver edging because it’s so easy to bend and install. You may need to dig out a little more soil to make room for it next to the pavers.
Drive the large plastic spikes into the ground with a hammer at regular intervals to hold the edging in place. When it’s all done, cover the base with soil.
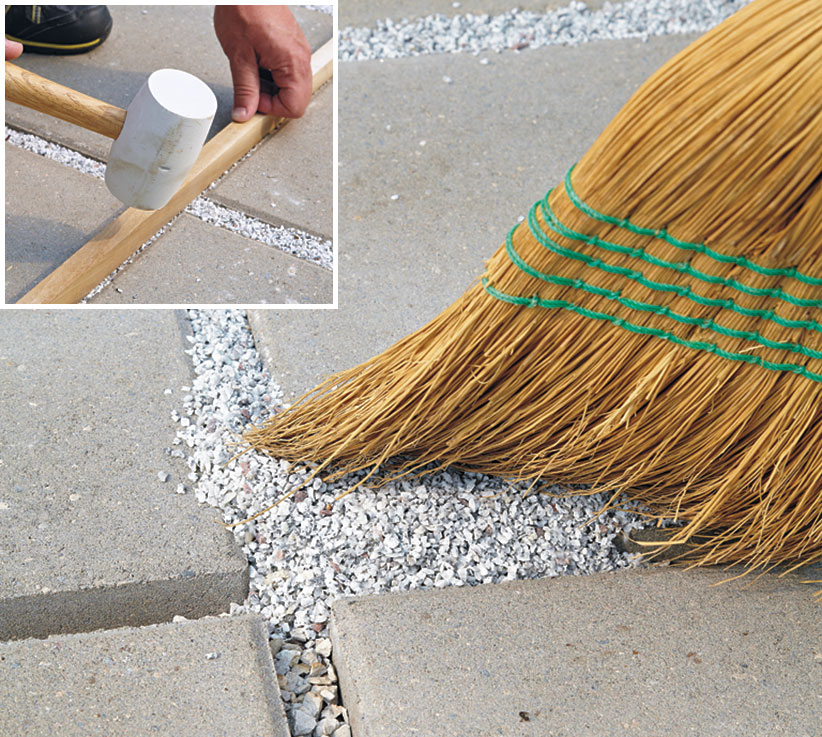
Step 4: Fill between the spaces
Add about ½ in. of gravel between pavers to help stabilize the joints. Then sweep crushed granite between the pavers with a broom like we did in the photo above.
Sometimes called turkey grit, this small stone is very economical. It’s available at your local feed store. We paid $10 for a 50-lb. bag. The inset shows another handy tip we discovered: Use the spacers as a tamper to help settle the crushed granite into place.
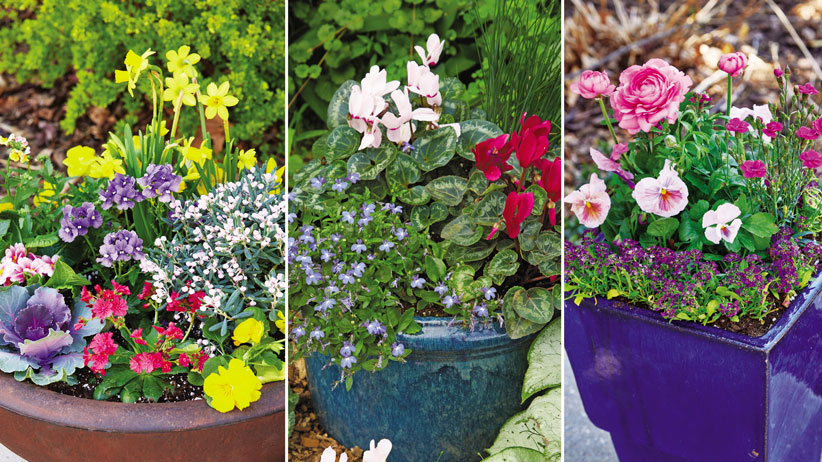
Once the hard work is done, now comes the fun part: designing your paver patio! You can read about decorating your patio here. Also see the planting plans for the containers and for the garden bed surrounding the patio.